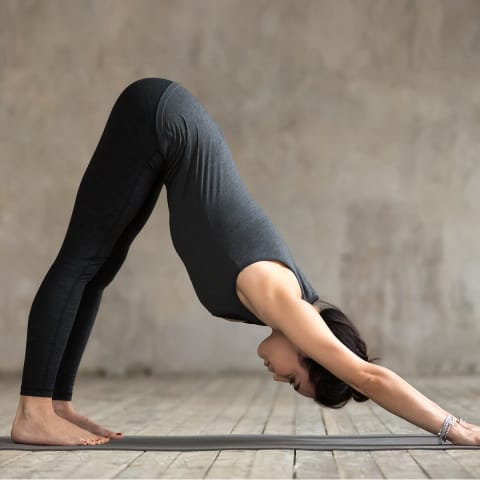
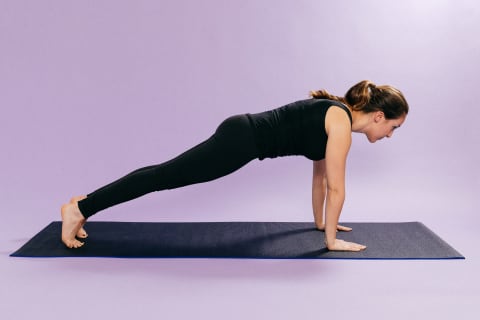
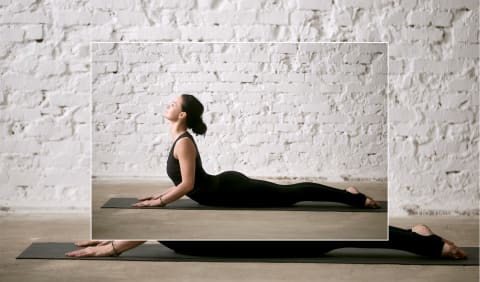
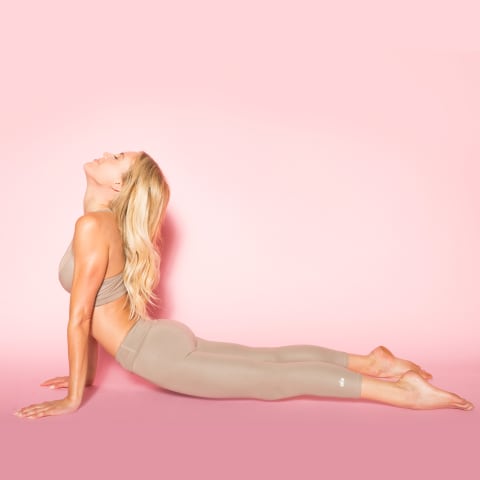
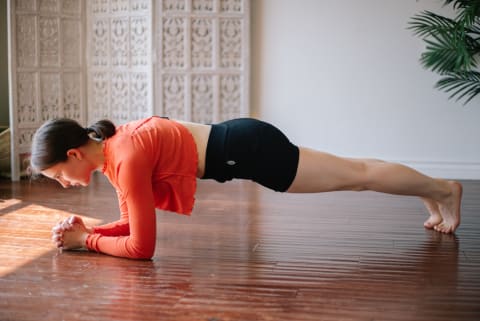
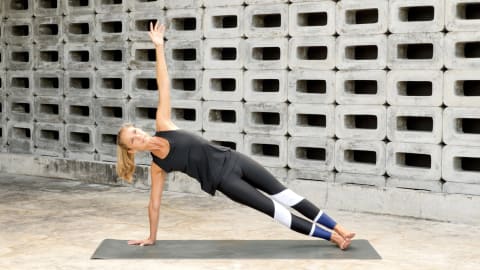
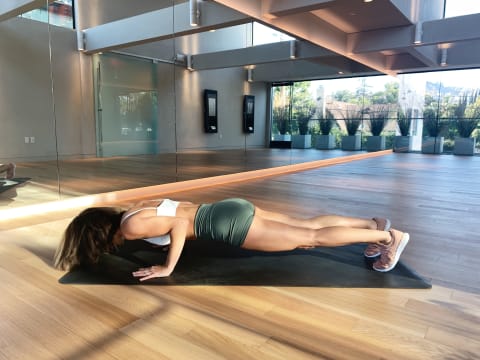
Often called the “low pushup,” Chaturanga (aka Four-Limbed Staff Pose) proves tricky without a solid core and well-developed shoulder and arm muscles. But a proper Chaturanga in your practice is within reach — here are eight common poses we practice in yoga, designed to build up enough strength over time to master the art of Chaturanga. Plus, your arms will look great too. Begin on your hands and knees, then tuck the toes and lift the hips up high until your body forms the shape of an upside-down “V.” Press into all four corners of your palms to engage the arm muscles. Feel the heads of the arm bones began to rotate outward. This will help shift your weight down the body and into your hips, taking some of that pressure off your wrists. Reach your heels down toward the mat, only allowing the soles of your feet to touch if your hamstrings allow. Drop your head so the neck is lengthened. Breathe here anywhere for 5-to-10 deep breaths. Adapted from How To Do Downward Dog, by Amy Jirsa. With hands and knees shoulder-width apart and fingers spread wide, keep the toes tucked under. Wrists are no further back than shoulders, and fingers grip the mat while the shoulders hug into their sockets as you reach the sternum forward. To modify, you can lower to your knees as you build up arm strength. Otherwise, keep the knees lifted and straighten the legs without letting the hips sag. Keep the legs active with the heels pressing toward the back of the mat. Your neck stays soft as you reach through the crown of your head with your gaze down at the floor. Adapted from Build An Awesome Core With This 10-Minute Yoga Sequence, by Sasha Taylor North Drop your shoulders away from the ears and let them slide down the back. Keeping the elbows slightly bent, lift through the collarbones and chest as you send your gaze up toward the sky. Optional: hover your hands off of the ground and use your lower back to lift the upper body away from the ground. Remember to relax the lower back and keep the back of the neck long. Arch the upper back, attempting to move from the thoracic spine rather than the lumbar or cervical spine. Always pause when you find yourself in this pose and breathe deeply. Adapted from How To Get The Most Out Of Cobra Pose, by Cori Martinez Photo: An Energizing Sequence To Invigorate Your Winter Practice, by Amy Lynch You should feel a nice C-shape curve throughout the spine, feeling the greatest backbend at the cervical spine, just at the base of the neck. Feel the external rotation of the arm bones as you spread through the collar bones. Press the tops of the feet into the mat and spread your toes. Adapted from 5 Ways To Advance Your Upward Dog, by Jennifer White Photo: Getty Images Point the tailbone straight up to the ceiling, relax your head and draw the shoulders away from the ears. As you press your chest toward the thighs, spread your hands wide or alternatively, interlace your hands together while staying on the forearms. As you build up forearm strength here, you can take some of the weight off the arms by engaging your core as well. Hold for 10 deep breaths. Adapted from 5 Basic Yoga Poses To Make You Feel Fantastic In 15 Minutes, by Nora Tobin Curl your toes under, inhale, and on your exhale, elevate your whole body — but leave your forearms and balls of your feet on the ground. You should feel and execute a straight line from the crown of your head to your heels. This means that you need to lengthen your tailbone towards your knees and lift your abs in towards your spine (this is activation of the deepest transverse abdominal muscles). Soften your upper back to iron out any curvature of your spine. Make sure that your legs are straight. Start with 10 to 30 seconds a day (depending on your starting strength). Every two to three days, add 15 more seconds until you are able to hold forearm plank for two minutes. Adapted from 4 Yoga Poses For Sexy Arms, by Julie Wilcox To make balance easier, rather than stacking your feet on top of each other, simply leave your feet where they were in your plank as your roll open to the side. The foot of your top leg will end up in front of your other foot, giving you a more solid base. You can also rest your lower knee on the ground until you have built up enough arm and shoulder strength. Hold for 3 to 5 breaths and switch sides. Adapted from Side Plank Pose: How-to, Tips, Benefits, by Michael Taylor Photo: Getty Images Next, roll WAY forward on your toes — even more than you think you should. (This ensures you will lower down with your arms in a 90 degree angle.) Now begin to lower down until your arms form 90 degrees and stop just at that point. Keep your core VERY engaged just as in plank — with abdominals and ribs really pulled in. HUG your elbows into the sides of your body and keep the tops of your shoulders pulled back away from your ears and pointing straight forward, not drooping down. Broaden through the chest, inviting your clavicles to “smile.” For an extra challenge, push back up to Plank Pose (aka high pushup) and then lower again through Chaturanga (low pushup). Repeat up to five times. Adapted from How To Do Chaturanga The Right Way, by Sherin Bual